Background
This project is an animated album cover for Taylor Swift’s 1989 album. Using Adobe Photoshop and After Effects, I edited photos into polaroids and then animated the polaroids to create the animated album cover.
Photo Editing
Since the original album cover is a polaroid picture, I decided to animate the album cover to have stacking polaroids that end with the original polaroid cover. Using photos from Taylor Swift’s 1989 promotional photoshoot, I edited them in Photoshop to give the photos a polaroid look. Using the curves adjustment layer, I brought up the white in the shadows and a little bit in the highlights to give the photos an oversaturated and faded look that most polaroids have.


I then adjusted the individual RGB channels on the photo. In the reds, I increased the intensity in the shadows and lowered the intensity in the highlights. I did the opposite in the greens - decreased intensity in the shadows and increased the intensity in the highlights. For the blues, I slightly increased the blues in the darkest parts of the photo and slightly decreased the blues in the brightest parts of the photo. Adjusting the RGB channels helps the photo achieve a cross processed look.

To simulate light leaks and overexposure, I added two solid colour adjustment layers. The two colours were a hot pink and a bright yellow. The adjustment layers were blended into the photo using the soft light blending mode and the opacity was lowered so that these colours were not too intense. I wanted the light leaks to be near the bottom edge so I used the brush tool to paint away the yellow and pink from the rest of the photo. To give the photo an even more realistic polaroid look, I applied gaussian blur to slightly blur the image.
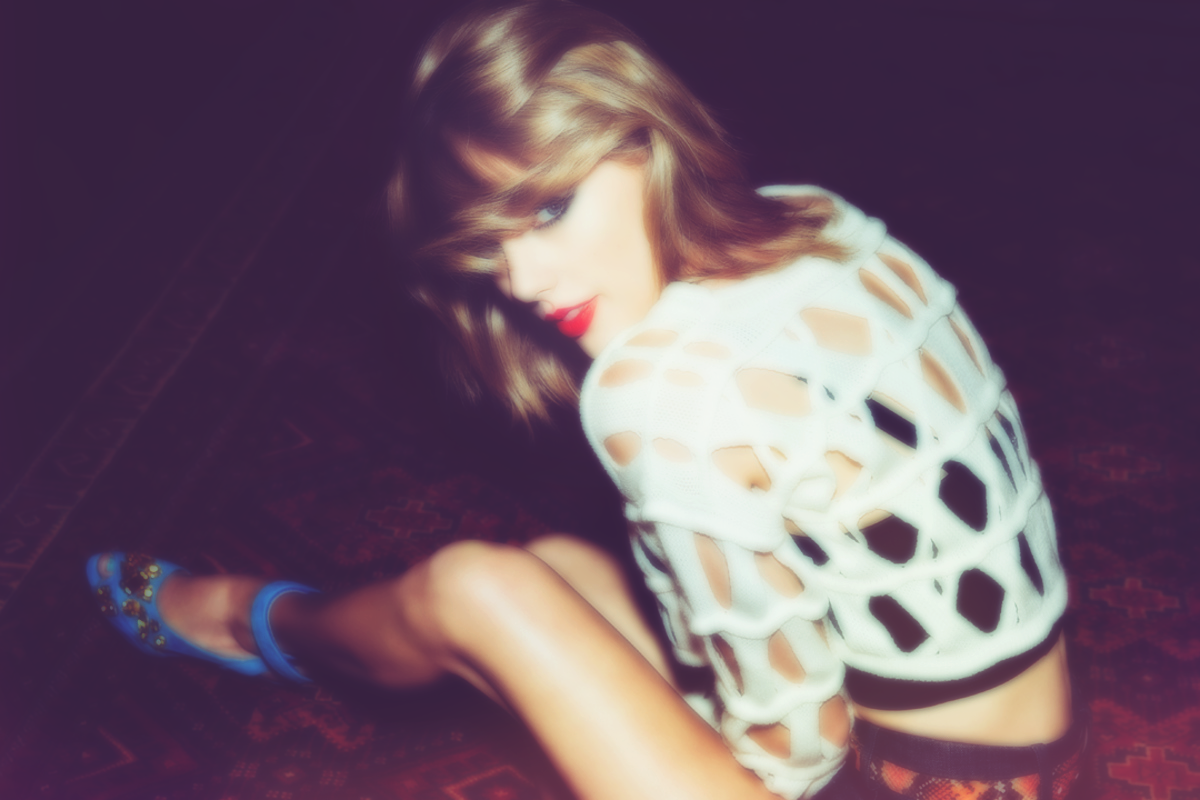
At this point, I was happy with the way the photos had turned out but they looked too perfect, too high quality. A polaroid camera would not be able to print a photo of such high resolution. To give the photo a grainy texture, I applied a soft grain texture and blended it into the photo using the soft light blending mode. After adding this texture, the polaroid effect was complete. These steps were repeated for 4 other photos with slight adjustments.

Animating
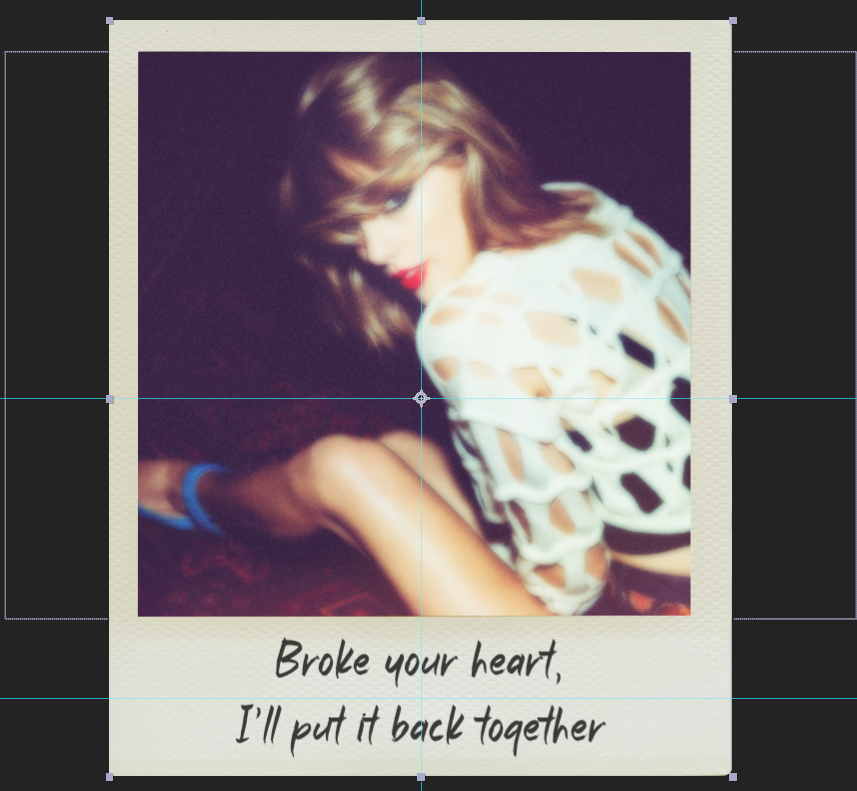
Before animating the polaroids, I placed the edited photos onto a blank polaroid template in After Effects. I then added lyrics from songs on the 1989 album onto the large blank spaces on the polaroids. Each polaroid was then pre-composed into a single pre-composition to be animated. Doing this in After Effects rather than Photoshop made the process quicker as I did not have to export the polaroids as images and then place them into the composition.
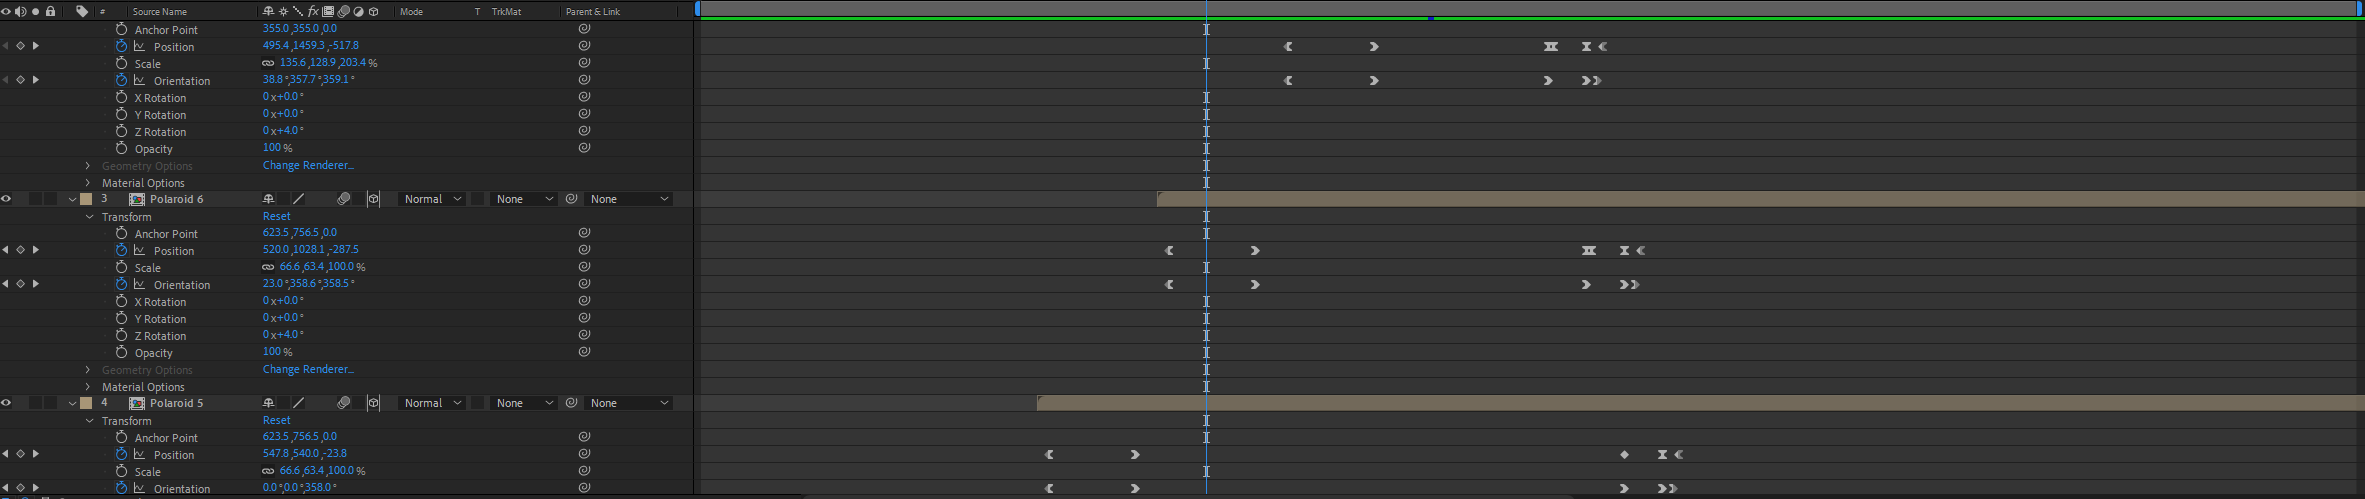
To achieve a more natural stacking effect, I turned each polaroid into a 3D object and turned on motion blur. For each polaroid, I added keyframes for position and orientation. The polaroids start off in a standing position and fall onto each other.

For the blowing away effect, I again added keyframes for position and orientation. The movement of the polaroid should feel natural. I played around with the X, Y, and Z orientations until I was happy with the movement of the polaroid. These values were then repeated across the other polaroids. For the stacking animation, each polaroid will fall down before the other appears in frame. This is so that the viewer is able to read the lyrics on each polaroid before the other one appears. When they blow away, the animation starts only a few frames apart as this created a more natural movement of the polaroids.
Reflection
This project helped me refine my photo editing and video editing skills. Revisiting this project, I would like to touch up the light leaks in the polaroid images. In the edited photos, I added in the light leaks near the edges of the photos, which also helped provide a vintage, worn out look. Looking at it again, I would pay closer attention to the light sources in the original photos and simulate my light leaks accordingly. Also, for the animation of the polaroids blowing away, I would like to animate each individual polaroid. In the current animation, the values of each keyframe are the same, leading to each polaroid having the exact same movement. Animating the movement of the individual polaroids would help me further achieve a more natural animation.
Back to top