6C10.10 Diffraction Plate
Concepts
2-slit interference, 1-slit diffraction, multiple-slit interference, cross-slit diffraction
Overview
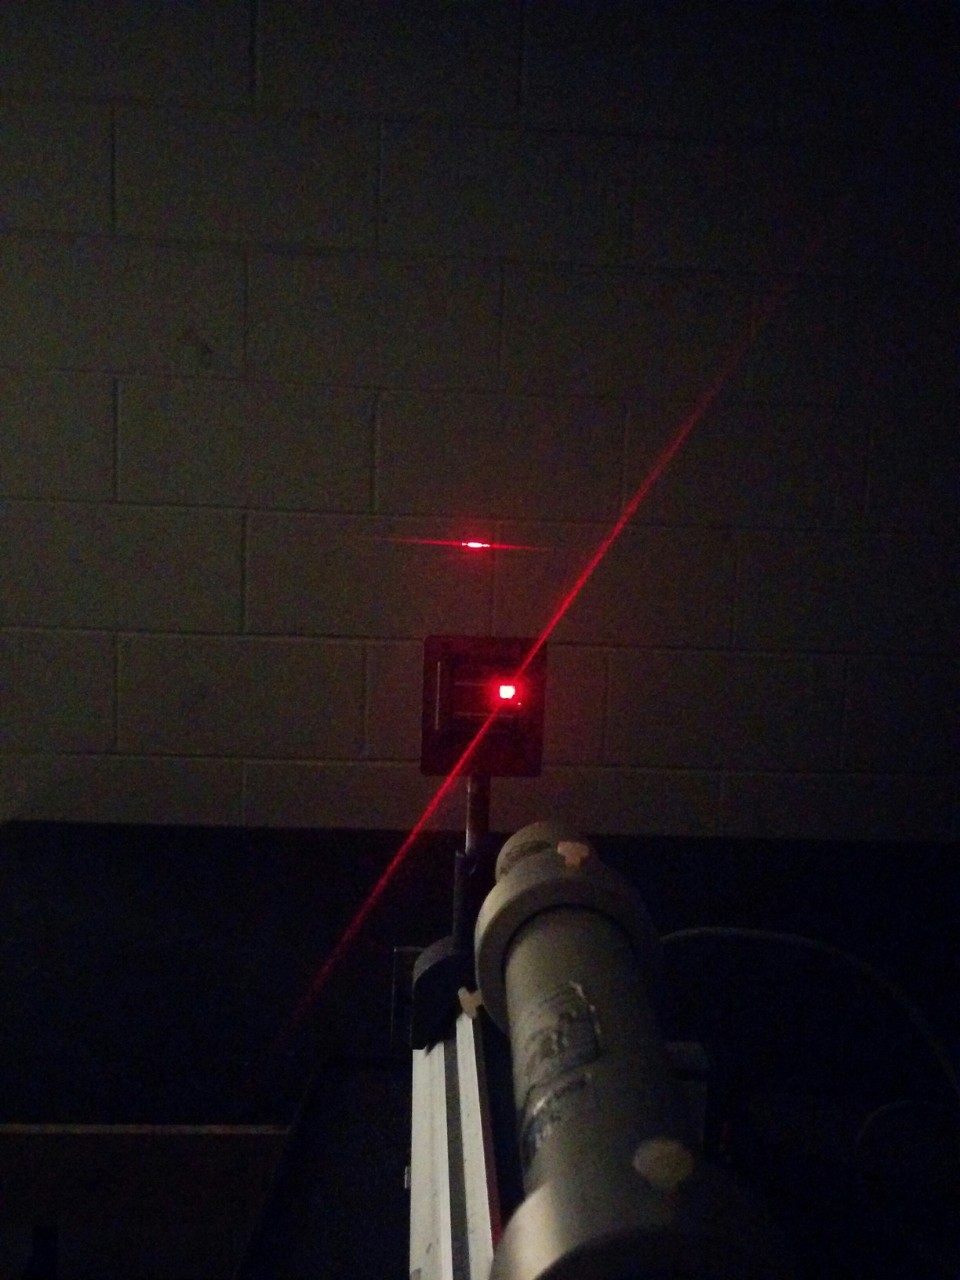
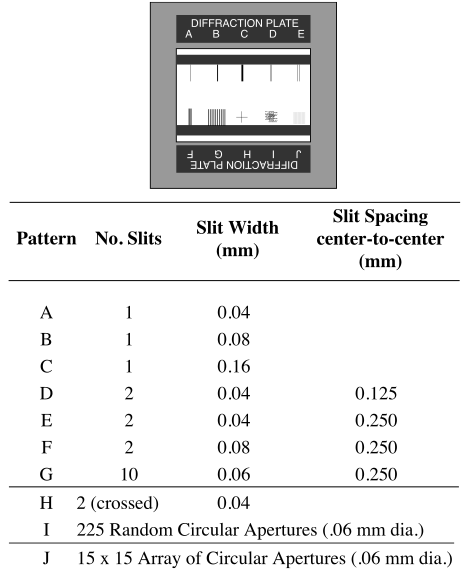
A He-Ne laser shines on a variety of aperture patterns to create interference fringes. Most of the aperture patterns are single- and double-slits. These are also the most-used.


Details
Equipment
- [1] Diffraction plate
- [1] Diffraction plate documentation
- [1] He-Ne tube laser
- [1] Optical rail
- [1] Slide mount
- [2] Saddle
- [1] Lab jack
- [1] Extension cord (if necessary)
Classroom Assembly
- Mount the laser and diffraction plate on opposite ends of the rail, making sure the laser is pointed away from people.
- Plug in the laser and aim it at the desired pattern, maximizing the intensity of the pattern.
- Use the lab jack to elevate the interference fringes to a screen, if necessary.
- Turn off the laser.
Important Notes
- Lasers can cause blindness. Use with caution.
- Manufacturer tolerance on the feature sizes of the plate is +/- 5 microns, but the smaller slits have likely deteriorated to be even smaller.
Script
- Show students the diffraction plate documentation, if desired.
- Turn off the lights.
- Turn on the laser. Point out spacings of the interference fringes (maxima, minima, as appropriate).
- Change to a different aperture pattern. Observe the differences between the fringe formations.
- Turn off the laser.
- Turn on the lights.
Additional Resources
References
- PIRA 6C10.10, 6D10.10, 6D20.10
- Pasco web catalog entry
Disclaimer
- Don't attempt this at home!
- SFU is not affiliated with any external sites linked here and is not responsible for their content.
Last revised
- 2024
Technicals
- Original construction: purchased. The plate comes from Pasco, catalogue number OS-8850.
Related AV
Related demos
If you have any questions about the demos or notes you would like to add to this page, contact Ricky Chu at ricky_chu AT sfu DOT ca.